The eLuminate document generator isn’t just a time-saver, it’s a powerful design tool.

A great letterhead sends a message that your firm is a professional, well put together operation. In this demonstration we’ll explore using the document generator to create an eye-catching and professional letterhead that you can use for all the documents you send to clients. The eLuminate document generator isn’t just a time-saver; it’s a powerful design tool.
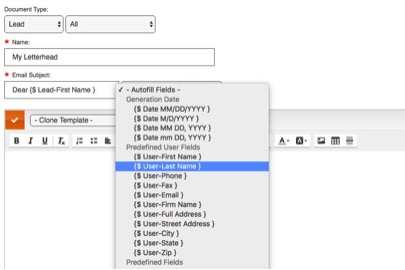
1. Create A New Template
First, create a new template. In your eLuminate account go to Settings > Documents and click New Template.
Set it up like this:
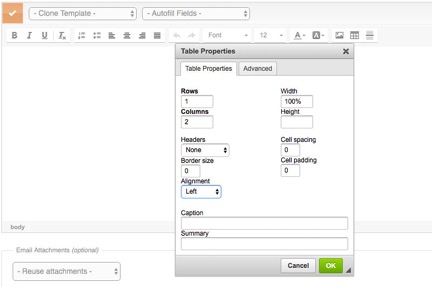
2. Making Tables
To create the layout for the heading, we’re going to use the Table Tool
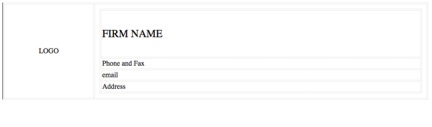
The design I’ve created has two columns:

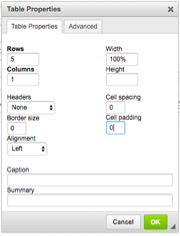
Click on the table tool and in the menu enter these settings to start a basic table for your letterhead.
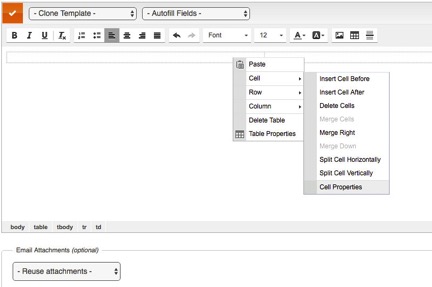
The table is created with two columns of equal width. We want to change the width on our first column to fit our logo. Place your cursor in the first column and right click (control + CLICK on a Mac) and you should see the settings menu for the table tool. Select Cell > Cell Properties.
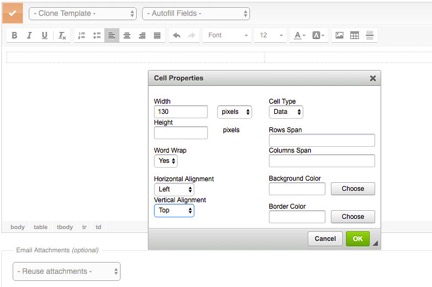
The Cell Properties menu will open and you can enter the following settings.
Now our table should look like this

Note: the gray lines are only for preview purposes, they will not be visible when we generate our document.
The left-hand column for our logo is set to 130 pixels wide. Since we haven’t set the width on the second column, its width is left fluid, which means that it will conform to fill however much space is available.
At this point, we have the backbone of our table. Our logo will go on the left, and the contact information will be on the right, like so.
To make it look right well make a second smaller table inside column 2.
Put your cursor inside column 2 and click the Table Tool and enter these settings:
3. Contact Info
In our original design we achieved a nice effect by playing with the fonts and sizes.

4. Adding our Logo
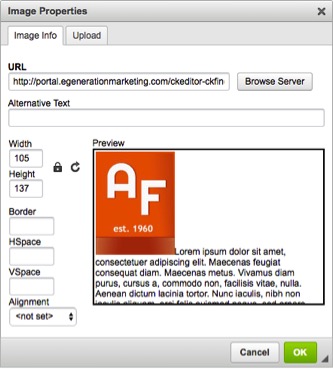
To upload and add our logo click the Image Tool Upload > Choose File
After you’ve chosen your image, click Send it to the Server. In the Image Properties menu you can adjust the images width, height and alignment accordingly.
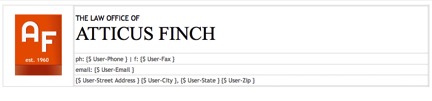
Our Letterhead should now look like this:
Keep in mind that when you email your letterhead, the actual format of your letterhead may vary slightly depending on what browser you’re using, whether you’re using a phone or a laptop, etc. Send trial emails to yourself to see what your logo looks like while in use to prefect your logo.